If you live in a rural area, you already know that every megabit of bandwidth counts. Whether you’re on Starlink, fixed wireless, or a DSL connection that’s barely hanging on, the last thing you need is half your precious bandwidth eaten up by ads, trackers, and telemetry data you never asked for.
Enter Pi-hole — a free, open-source DNS sinkhole that blocks ads and trackers across your entire home network. Every device. Every app. No per-device configuration needed. Set it up once on a tiny Raspberry Pi, point your router at it, and enjoy cleaner, faster internet on everything from your laptop to your smart TV.
Why Pi-hole Matters for Rural Internet Users
Urban dwellers with gigabit fiber might not notice ads eating bandwidth. But when you’re working with 25 Mbps (or less), those auto-playing video ads, tracking pixels, and background telemetry requests add up fast. Pi-hole eliminates them at the DNS level before they ever reach your devices.
- Faster page loads — Pages load noticeably faster when you’re not downloading dozens of ad scripts and tracking beacons
- Less bandwidth waste — Studies show ads can consume 30-50% of mobile page data. On a metered or slow connection, that’s significant
- Network-wide protection — Covers every device including smart TVs, IoT gadgets, phones, and tablets — even devices that don’t support ad blockers
- Improved security — Blocks known malware domains, phishing attempts, and cryptojacking scripts at the DNS level
- Better privacy — Stops trackers from following you across the web, including those from smart home devices that phone home constantly
What You’ll Need
The beauty of Pi-hole is that it runs on incredibly minimal hardware. A Raspberry Pi that costs less than dinner out will protect your entire network 24/7.
Hardware
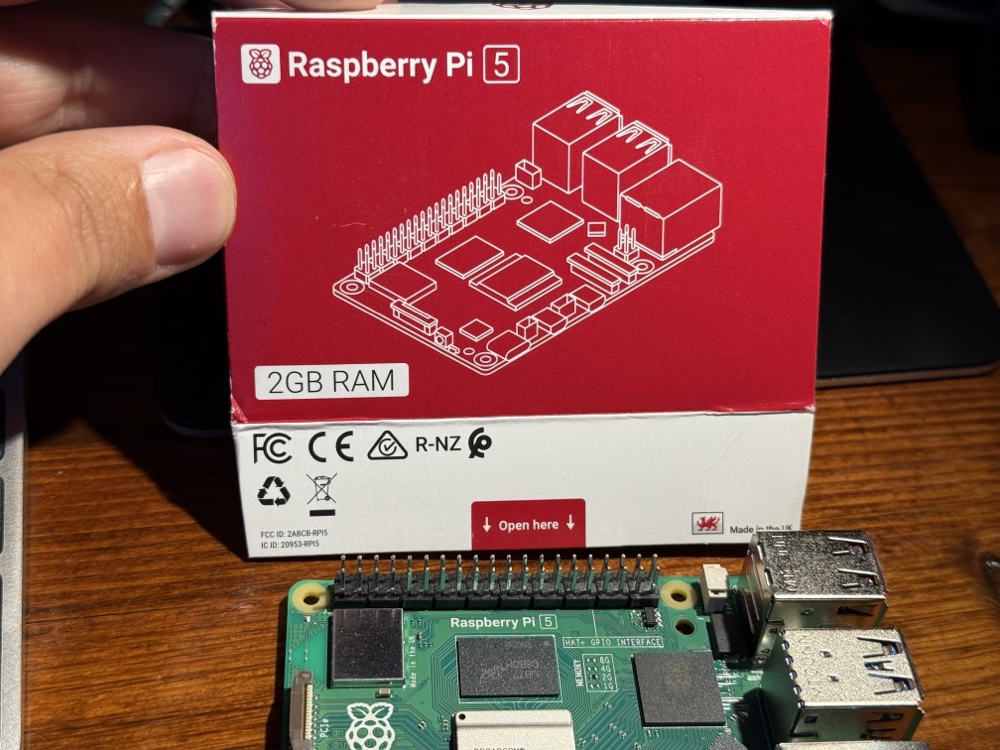
- Raspberry Pi 5 (4GB or 8GB) — The latest and greatest. Overkill for Pi-hole alone, but great if you want to run other services too. Raspberry Pi 5 Starter Kit on Amazon
- Raspberry Pi 4 (2GB+) — Still excellent and widely available. A 2GB model handles Pi-hole with ease. Raspberry Pi 4 on Amazon
- MicroSD Card (32GB+) — Get a reliable one; cheap cards fail. Samsung EVO Select 64GB on Amazon
- Case with cooling — Pi-hole runs cool, but a case keeps dust out. Raspberry Pi 5 Case with Fan on Amazon
- Ethernet cable — Always hardwire your DNS server for reliability
- USB-C power supply — Use the official one or a quality third-party adapter
Budget option: A Raspberry Pi Zero 2 W ($15) can run Pi-hole just fine if DNS filtering is all you need. You can even run it on an old laptop or a spare PC — Pi-hole supports any Debian-based Linux system.
Step-by-Step Installation
Step 1: Set Up Your Raspberry Pi
Flash Raspberry Pi OS Lite (64-bit) to your microSD card using the Raspberry Pi Imager. In the Imager settings, enable SSH, set your username/password, and configure your WiFi (though I recommend Ethernet for reliability).
Boot the Pi, find its IP address on your network, and SSH in:
ssh pi@192.168.1.XStep 2: Assign a Static IP
Your Pi-hole needs a static IP address since every device on your network will rely on it for DNS. The easiest way is to set a DHCP reservation in your router. Alternatively, configure it directly on the Pi by editing the network configuration.
Step 3: Install Pi-hole
The installation is a single command. SSH into your Pi and run:
curl -sSL https://install.pi-hole.net | bashThe installer walks you through a few choices:
- Upstream DNS provider — Choose Cloudflare (1.1.1.1) or Google (8.8.8.8), or set a custom one later
- Blocklists — Accept the default Steven Black list to start
- Admin interface — Say yes — this gives you a beautiful web dashboard
- Logging — Enable it for troubleshooting and stats
When it finishes, you’ll see your admin password. Write it down! You can change it later with pihole -a -p.

Step 4: Configure Your Router
This is the magic step. Log into your router and change the DNS server setting to your Pi-hole’s IP address. This is usually found under LAN/DHCP settings.
Once configured, every device that connects to your network automatically uses Pi-hole for DNS — no app installs, no browser extensions, no per-device setup.
Pro tip: If your ISP router doesn’t let you change DNS settings (looking at you, certain rural ISPs), you can configure Pi-hole as your DHCP server instead and disable DHCP on your router.
Running Two Pi-holes for Redundancy
Here’s a tip from someone who’s been running Pi-hole for years: run two of them. Set your primary DNS to one Pi-hole and your secondary to the other. If one goes down (SD card failure, power issue, updates), your network keeps humming along.
A second Raspberry Pi Zero 2 W is only about $15, and the peace of mind is worth every penny. Use Gravity Sync to keep your blocklists and settings synchronized between the two.
Adding More Blocklists
The default blocklist is a great start, but you can supercharge Pi-hole by adding community-maintained lists. Head to Adlists in the admin panel and add lists from The Firebog — a curated collection of quality blocklists.
Start with the “ticked” (safe) lists, which block ads and trackers without breaking legitimate sites. You can always add more aggressive lists later.
What to Expect
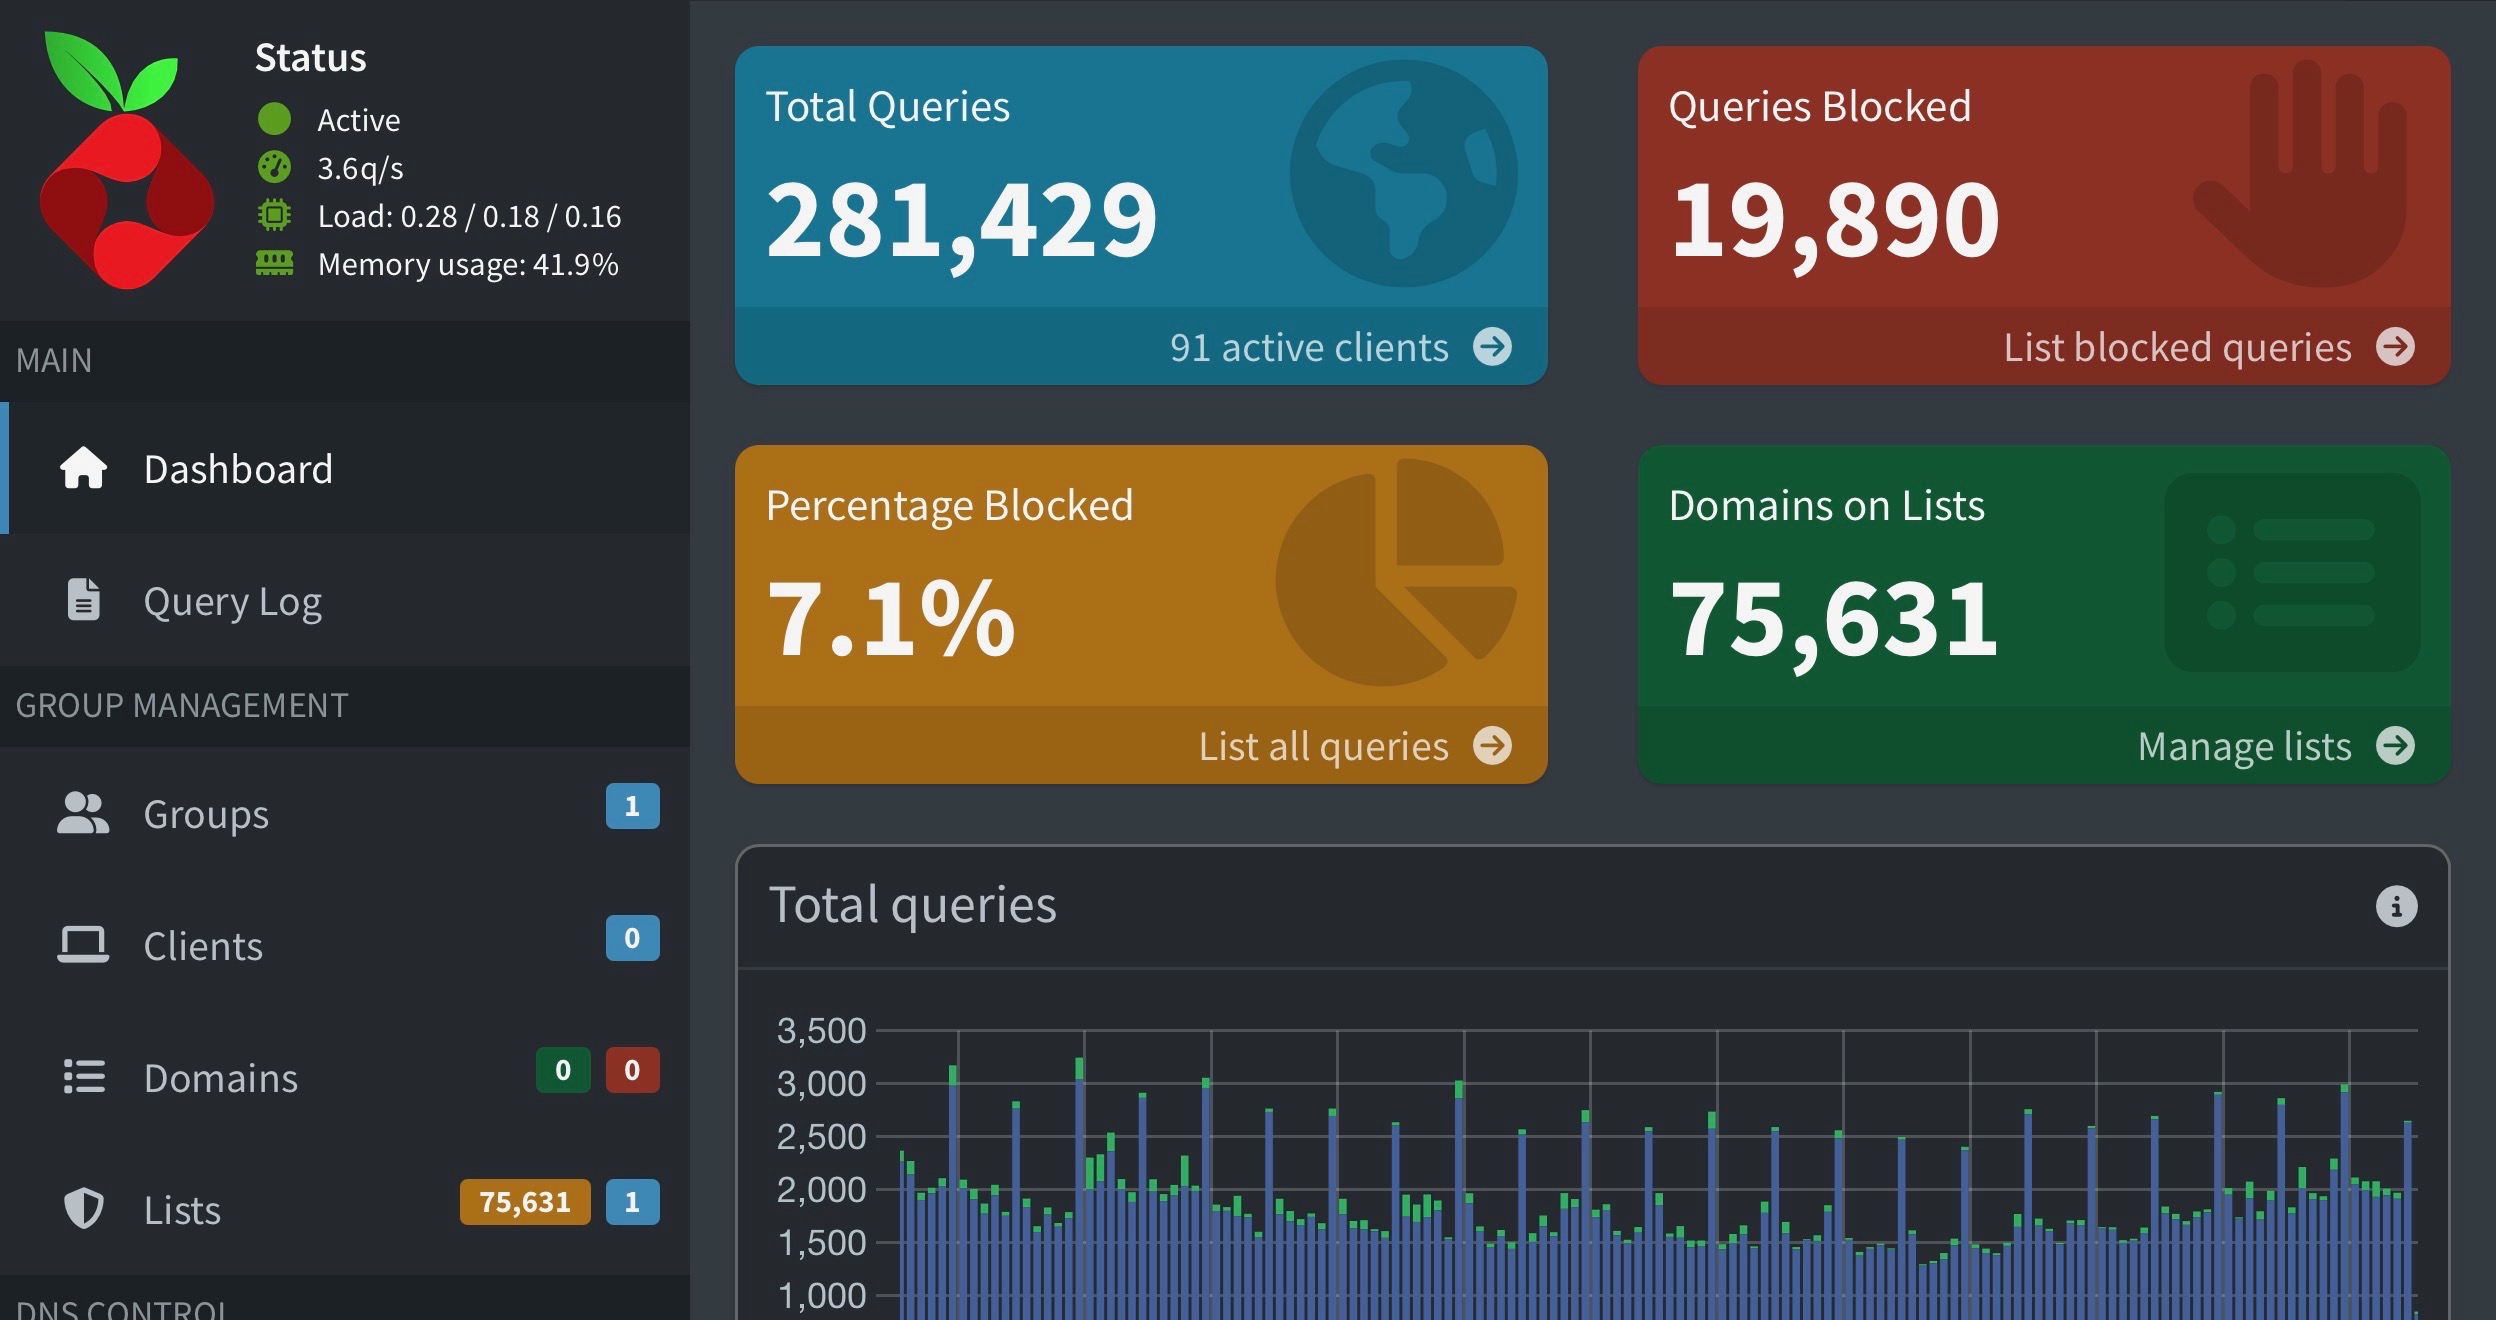
After running Pi-hole for a week, check your dashboard. Most households see 20-40% of all DNS queries blocked. That’s not a typo — up to 40% of your network’s DNS traffic is ads, trackers, and telemetry that you never asked for and never benefit from.
On a rural internet connection, that translates to real, measurable improvements in page load times and bandwidth availability. Your smart TV stops phoning home to dozens of analytics servers. Your kids’ tablets load YouTube faster. Your work video calls get a little more breathing room.
Troubleshooting Tips
- A site breaks after enabling Pi-hole? Check the query log in the admin panel, find the blocked domain, and whitelist it
- Pi-hole stops working after a power outage? That’s your SD card. Use a quality card and consider a reliable Samsung or SanDisk card
- Want to bypass Pi-hole on one device? Set that device’s DNS manually to 8.8.8.8 instead of using DHCP
- Slow DNS resolution? Make sure your Pi is on Ethernet, not WiFi. DNS needs to be fast and reliable
Final Thoughts
Pi-hole is one of those rare projects where a $50 investment and 30 minutes of setup time deliver permanent, tangible improvements to your daily internet experience. For rural users dealing with limited bandwidth, it’s not just a nice-to-have — it’s practically essential.
Once you see that dashboard showing thousands of blocked queries per day, you’ll wonder how you ever lived without it. And when your neighbor asks why your internet “feels faster,” you’ll have a great conversation starter about the tiny computer sitting next to your router.
Questions about setting up Pi-hole on your rural network? Drop a comment below — I’ve been running dual Pi-holes for years and am happy to help troubleshoot.