Setting up reliable WiFi coverage across a large rural property is one of the biggest challenges for homeowners with 5-50+ acres. Whether you need internet in your barn, workshop, guest house, or just reliable coverage around your main home, a well-designed mesh wifi rural property setup can transform your connectivity experience. In this comprehensive guide, we’ll walk you through choosing and installing the best mesh WiFi systems for rural properties, including outdoor wifi for farm operations.

Why Standard WiFi Fails on Rural Properties
Most consumer routers are designed for typical suburban homes under 3,000 square feet. Rural properties face unique challenges that make standard WiFi setups inadequate:
- Distance: Outbuildings may be 100-1000+ feet from your main house
- Obstacles: Barns, silos, hills, and trees block WiFi signals
- Weather exposure: Outdoor equipment needs proper weatherproofing
- Power requirements: Remote locations often lack convenient power sources
- Bandwidth needs: Multiple buildings with different usage patterns
Step 1: Assess Your Coverage Needs
Before choosing equipment, map out your property and identify your coverage goals:
Create a Property Map
- Mark your main house and internet entry point
- Identify all buildings needing WiFi coverage
- Note distances between structures
- Mark obstacles like hills, dense trees, or large metal buildings
- Identify available power sources at each location
Determine Bandwidth Requirements
- Light use: Security cameras, occasional browsing (5-25 Mbps per building)
- Moderate use: Smart home devices, streaming, video calls (25-100 Mbps)
- Heavy use: 4K streaming, gaming, video conferencing (100+ Mbps)
Step 2: Choose Between Consumer and Prosumer Systems
Consumer Mesh Systems (Good for smaller properties: 5-15 acres)
Consumer mesh systems are easier to set up but have limited range and fewer advanced features:
- Range: 150-300 feet per node outdoors
- Pros: Easy setup, affordable, good app interfaces
- Cons: Limited outdoor options, fewer advanced features
Prosumer Systems (Best for larger properties: 15+ acres)
Prosumer systems offer enterprise-grade features with more complexity:
- Range: 500+ feet per access point
- Pros: Superior performance, weather-resistant options, advanced management
- Cons: More complex setup, higher cost
Step 3: Best Mesh WiFi Systems for Rural Properties
Top Consumer Mesh Systems
1. TP-Link Deco X60 (3-Pack) – Best Overall Value
The TP-Link Deco X60 offers excellent performance for medium-sized rural properties. With WiFi 6 support and easy setup, it’s our top pick for properties up to 15 acres.
- Coverage: Up to 7,000 sq ft (5,500 sq ft realistic outdoor range)
- Speed: AX3000 (574 Mbps on 2.4GHz + 2402 Mbps on 5GHz)
- Price: $200-250 for 3-pack
- Best for: Properties 5-15 acres with moderate internet usage
2. NETGEAR Orbi Pro WiFi 6E (SXK80) – Premium Performance
The NETGEAR Orbi Pro SXK80 delivers enterprise-level performance in a consumer package, ideal for demanding rural applications.
- Coverage: Up to 9,000 sq ft with strong signal penetration
- Speed: AXE6600 with dedicated 6GHz backhaul
- Price: $700-900 for 3-pack
- Best for: High-bandwidth applications, 4K streaming, large files
Top Prosumer Systems
1. Ubiquiti UniFi System – Professional Grade
The Ubiquiti UniFi ecosystem offers the most flexibility and performance for large rural deployments:
- UniFi Dream Machine (UDM): Central controller and router ($399)
- UniFi 6 Long Range AP: Indoor access points ($179 each)
- UniFi 6 Mesh: Outdoor mesh units ($179 each)
- UniFi Switch 8 PoE: Power over Ethernet switch ($109)
2. TP-Link Omada Business Solution
TP-Link’s Omada series provides professional features at consumer-friendly prices:
- OC200 Controller: Centralized management ($89)
- EAP660 HD Access Points: High-density indoor APs ($149 each)
- EAP610-Outdoor: Weather-resistant outdoor units ($179 each)
- TL-SG2008P: 8-port PoE switch ($89)
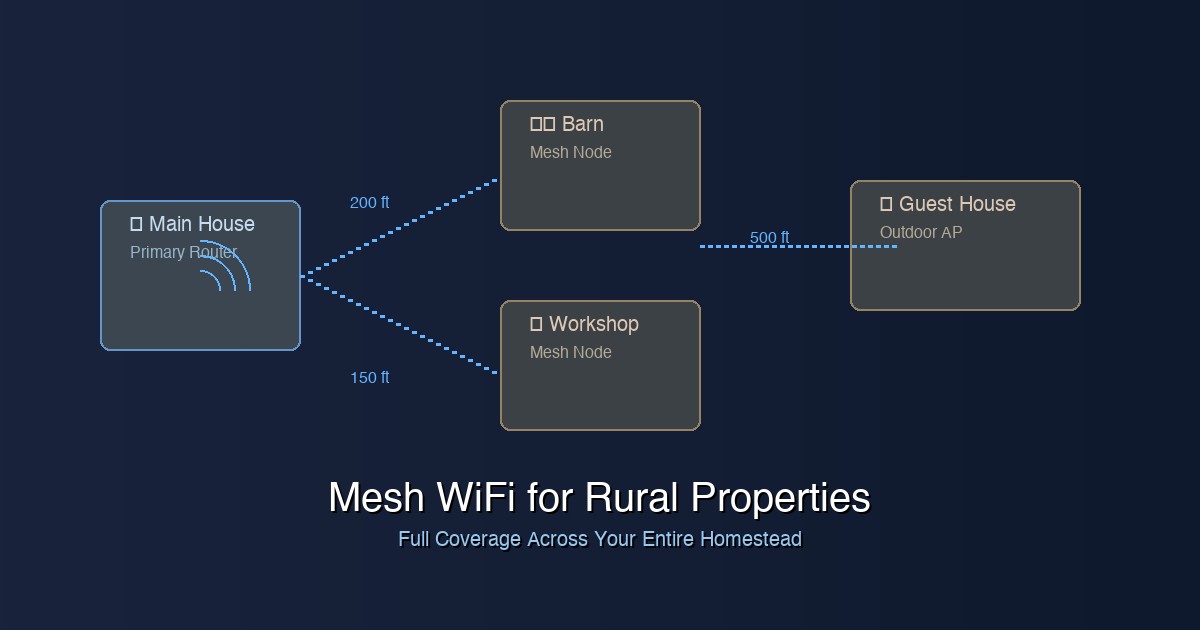
Step 4: Outdoor Access Points for Barns and Outbuildings
Getting outdoor wifi for farm buildings requires specialized equipment designed to handle weather exposure and long-range transmission:
Best Outdoor Access Points
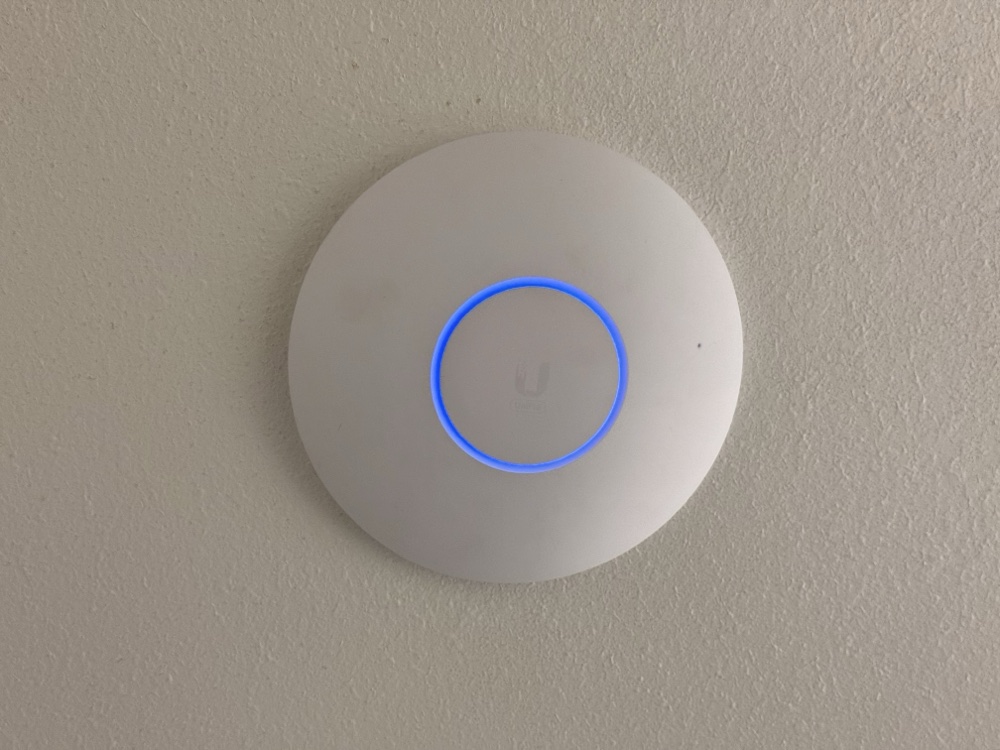
1. Ubiquiti UniFi 6 Mesh
The UniFi 6 Mesh is purpose-built for outdoor deployments with excellent range and weather resistance.
- Range: 500+ feet with clear line of sight
- Weather rating: IP54 (protected against dust and rain)
- Power: 802.3af PoE (can use PoE injector if needed)
- Price: ~$179
2. TP-Link EAP610-Outdoor
The EAP610-Outdoor provides excellent value for farm and rural applications.
- Range: 400+ feet outdoor coverage
- Weather rating: IP65 (dust-tight, water jet protection)
- Speed: AX1800 WiFi 6
- Price: ~$179
3. EnGenius EWS357AP – Budget Option
For budget-conscious deployments, the EnGenius EWS357AP offers decent outdoor coverage at a lower price point.
- Range: 300+ feet
- Weather rating: IP68
- Speed: AC1200
- Price: ~$89
Step 5: Ethernet vs Wireless Backhaul – Choosing the Right Connection
Wired Ethernet Backhaul (Recommended)
Running ethernet cable provides the most reliable connection for rural mesh networks:
- Pros: Maximum speed, no interference, most reliable
- Cons: Installation cost and complexity
- Best for: Permanent installations, high-bandwidth needs
Recommended Outdoor Ethernet Cable
Cat6 Direct Burial Cable ($45 for 250 feet) is designed for underground installation and harsh weather conditions.
- Direct burial rated (no conduit needed for underground runs)
- UV resistant for aerial installations
- Supports Gigabit speeds up to 250 feet
- Includes drain wire for added electrical protection
Wireless Backhaul
Wireless backhaul works when ethernet installation isn’t feasible:
- Pros: No cable installation, easier to relocate
- Cons: Reduced speeds, weather interference, line-of-sight requirements
- Best for: Temporary setups, challenging terrain
Step 6: Understanding PoE (Power over Ethernet)
Power over Ethernet (PoE) is crucial for rural WiFi deployments because it eliminates the need for electrical outlets at every access point location:
PoE Standards
- 802.3af (PoE): 15.4W – Powers basic access points
- 802.3at (PoE+): 30W – Powers higher-performance APs
- 802.3bt (PoE++): 60-100W – Powers advanced equipment
Best PoE Switches for Rural Deployments
TP-Link TL-SG2008P – 8-Port PoE Switch
The TL-SG2008P ($89) provides 8 Gigabit PoE+ ports with 62W total power budget – perfect for small to medium rural deployments.
Ubiquiti UniFi Switch 8 PoE
The UniFi Switch 8 PoE ($109) integrates seamlessly with UniFi systems and provides centralized management.
PoE Injectors for Single Access Points
For remote locations, PoE injectors ($15-25) let you power individual access points without a full PoE switch.
Step 7: Weatherproof Enclosures and Mounting
Protecting your networking equipment from weather is critical for reliable operation:
Outdoor Equipment Enclosures
- NEMA 4X Enclosures: For PoE switches and injectors ($45-85)
- Weatherproof Boxes: For ethernet connections and small equipment ($25-40)
- Ventilation fans: Prevent overheating in hot climates
Mounting Solutions
- Pole mounts: For open areas between buildings
- Building mounts: Attach to barn walls or eaves
- Tower mounts: For maximum elevation and range
Step 8: Point-to-Point Links for Distant Buildings
For buildings more than 500 feet from your main network, point-to-point wireless bridges may be more effective than mesh:
Best Point-to-Point Solutions
Ubiquiti NanoStation 5AC Loco
The NanoStation 5AC Loco ($69 each) provides reliable point-to-point connections up to 5+ miles with clear line of sight.
- Range: Up to 5+ miles
- Speed: Up to 450 Mbps
- Use case: Connecting distant outbuildings to main network
TP-Link CPE710
The TP-Link CPE710 ($89 each) offers excellent performance for medium-distance bridges.
- Range: Up to 3 miles
- Speed: Up to 867 Mbps
- Weather rating: IP65
Step 9: Integrating with Starlink (Rural Internet Solution)
Many rural properties rely on Starlink satellite internet. Here’s how to optimize your mesh WiFi system for Starlink:
Starlink + Mesh WiFi Setup
- Bypass Starlink Router: Use Starlink’s ethernet adapter ($25) to connect directly to your mesh system’s main router
- Position Strategically: Place your primary mesh node near the Starlink router location
- Configure QoS: Set up Quality of Service rules to prioritize critical traffic during peak usage
- Monitor Data Usage: Some Starlink plans have deprioritization after certain data thresholds
Recommended Starlink-Compatible Setup
- Entry Level: Starlink + TP-Link Deco X60 system
- Professional: Starlink + Ubiquiti UniFi system with bandwidth monitoring
- High-Demand: Starlink + Business plan + enterprise-grade mesh system
System Comparison and Pricing
| System | Best For | Coverage Area | Price Range | Complexity |
|---|---|---|---|---|
| TP-Link Deco X60 | 5-15 acre properties | 5,500 sq ft per 3-pack | $200-250 | Easy |
| NETGEAR Orbi Pro | High-bandwidth users | 9,000 sq ft per 3-pack | $700-900 | Easy |
| Ubiquiti UniFi | 15+ acre properties | 500+ ft per AP | $800-1500+ | Advanced |
| TP-Link Omada | Budget prosumer | 400+ ft per AP | $600-1200 | Moderate |
| Point-to-Point Bridge | Distant buildings (1+ mile) | Up to 5+ miles | $140-180 per link | Moderate |
Step-by-Step Installation Guide
Phase 1: Plan Your Network
- Test existing coverage: Walk your property with a WiFi analyzer app to identify dead zones
- Plan ethernet runs: Mark cable routes on your property map
- Identify power sources: Note where PoE switches or injectors will be located
- Check line of sight: For wireless connections, ensure clear paths between access points
Phase 2: Install Core Infrastructure
- Set up main router: Connect to your internet source (Starlink, cable, etc.)
- Install PoE switch: Place in weatherproof enclosure if outdoors
- Run ethernet cables: Use direct burial cable for underground runs
- Test connections: Verify all cable runs before mounting equipment
Phase 3: Deploy Access Points
- Start close to main router: Install and configure the first AP
- Work outward: Add APs progressively, testing coverage at each step
- Optimize placement: Adjust mounting height and angles for best coverage
- Fine-tune settings: Adjust power levels and channel assignments
Phase 4: Test and Optimize
- Coverage testing: Test WiFi performance in all target areas
- Speed testing: Verify throughput meets your requirements
- Roaming testing: Ensure smooth handoffs between access points
- Document configuration: Save settings and create network documentation
Troubleshooting Common Rural WiFi Issues
Weak Signal in Outbuildings
- Solution: Add dedicated outdoor AP or point-to-point bridge
- Check: Obstacles blocking signal path
- Consider: Higher-gain antennas for better penetration
Intermittent Connectivity
- Weather-related: Check waterproofing and enclosures
- Power issues: Verify PoE power budget isn’t exceeded
- Interference: Check for conflicting wireless devices
Slow Speeds
- Backhaul bottleneck: Upgrade to wired ethernet connections
- Channel congestion: Use WiFi analyzer to find clear channels
- Distance limitations: Add intermediate access points
Maintenance and Monitoring
Regular Maintenance Tasks
- Monthly: Check equipment for physical damage, clean solar panels on batteries
- Quarterly: Update firmware, check ethernet connections
- Annually: Replace weatherproofing, check mounting hardware
- After storms: Inspect all outdoor equipment and connections
Monitoring Tools
- Built-in dashboards: Use manufacturer’s management apps
- PRTG or LibreNMS: For advanced monitoring
- WiFi Analyzer apps: Regular site surveys
- Speed test automation: Monitor internet performance trends
Conclusion: Building Reliable Rural WiFi
Setting up mesh wifi for your rural property doesn’t have to be overwhelming. By following this step-by-step approach and choosing the right equipment for your specific needs, you can achieve reliable WiFi coverage across even large rural properties.
Remember these key points:
- Start with proper planning – Map your property and identify actual coverage needs
- Choose the right system – Consumer mesh for smaller properties, prosumer for larger ones
- Prioritize wired connections – Ethernet backhaul provides the most reliable performance
- Plan for weather – Use proper enclosures and weatherproofing
- Consider Starlink integration – Many rural properties benefit from satellite internet
- Test thoroughly – Verify coverage and performance before finalizing installation
Whether you’re streaming video in your workshop, running security cameras in your barn, or just want reliable WiFi around your property, a well-designed mesh wifi rural property system can transform your connectivity experience. The investment in proper equipment and installation pays dividends in reliability and performance for years to come.
Have questions about setting up WiFi on your rural property? Share your specific challenges in the comments below, and we’ll help you find the right solution for your unique situation.