Electric vehicles make more sense in rural areas than most people think. Cheap overnight electricity, solar potential, and never needing to drive to a gas station? Sign me up. But setting up home charging when you’re 20 miles from the nearest electrician requires some planning.
Here’s everything you need to know about EV charging on a rural property — from basic Level 1 to full solar integration.
Understanding EV Charging Levels
Level 1 is your regular 120V household outlet. It’s painfully slow — about 3 to 5 miles of range per hour, which means a full 250-mile battery takes over 60 hours. But it’s free if you already have an outlet in your garage or carport, and it works fine for plug-in hybrids or very short commutes.
Level 2 is the sweet spot for most homeowners. It uses a 240V dedicated circuit (same type your dryer runs on) and delivers 25 to 50 miles of range per hour. Plug in when you get home, wake up to a full battery. A typical 40 to 60 amp circuit gives you a complete charge in 6 to 10 hours.
Level 3 (DC Fast Charging) is overkill for home use. The equipment costs $20,000+, requires commercial electrical service, and actually degrades your battery faster than Level 2. Leave this one for road trip stops.
Planning Your Installation
Most rural homes have 100 to 200 amp service. A 32-amp Level 2 charger pulls about 7.7 kW on a 40-amp circuit, while a 48-amp charger pulls 11.5 kW on a 60-amp circuit. If your main panel is already near capacity, you might need a panel upgrade ($1,500 to $3,000), a load management device ($300 to $500), or a smart charger with load balancing built in. Many EVs let you set the charging amps manually, so a 48-amp charger can always be dialed back to 32 amps if your panel needs breathing room.
For placement, the ideal spot is within 25 feet of your electrical panel (shorter wire runs save money), protected from weather, and accessible from the driver’s side of your vehicle. The reality on rural properties is that your panel might be far from where you park, and trenching for underground runs adds cost. A subpanel near the parking area is worth considering.
Even in rural areas, you’ll typically need an electrical permit and inspection. Some utilities offer $500 to $1,000 rebates but require using their approved installers, so check before you hire someone.
Recommended Chargers
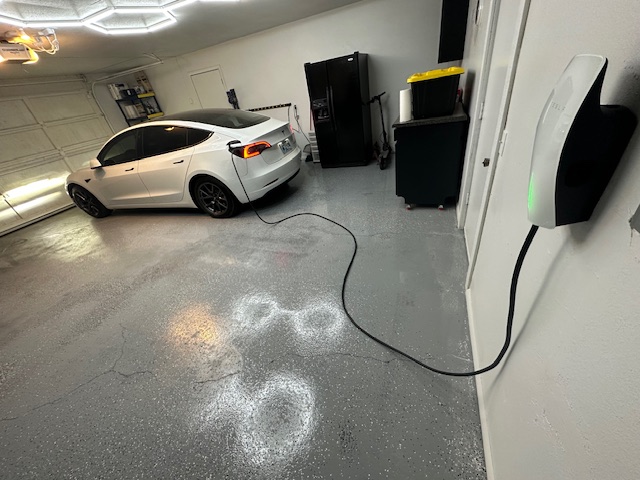
The ChargePoint Home Flex (~$600) is my pick for best overall. It adjusts from 16 to 50 amps, connects via WiFi with app control, works with any EV, and is rated for indoor or outdoor installation with a 23-foot cable. The adjustable amperage means you can install it now and upgrade your circuit later.
For a budget option, the Lectron 40A (~$300) is basic but reliable with good cable length and no WiFi — which some people actually prefer.
If you’re integrating with solar, the Emporia Smart Charger (~$450) works with the Emporia Vue energy monitor so you can schedule charging during peak solar production and balance loads across your system.
And the Lectron Portable (~$250) is great as a backup or travel charger — it switches between 120V and 240V with adjustable amperage.
DIY vs. Hiring an Electrician
If you’ve wired a 240V outlet before (dryer, welder, hot tub), an EV charger installation is similar work: install the appropriate breaker, run the correct gauge wire to your location, mount the charger, and connect everything. For wire gauge, you’ll need 8 AWG copper for a 40-amp circuit, 6 AWG for 50 amps, or 4 AWG for 60 amps. DIY materials typically run $200 to $400 on top of the charger.
Call an electrician if your panel needs an upgrade, you’re not comfortable with high-voltage work, the run requires trenching, or local codes mandate licensed installation. Budget $500 to $1,500 for labor plus materials.
Solar and EV: A Perfect Match
Rural properties often have excellent solar potential, and combining solar with EV charging creates a virtuous cycle. The average EV uses about 3 to 4 kWh per 10 miles. At 12,000 miles a year, that’s roughly 4,000 kWh. A 4 kW solar array produces about 5,500 kWh per year in Oklahoma — enough to completely offset your fuel cost.
For integration, the simplest approach is time-of-use scheduling: program your charger to run when solar production peaks at midday or when rates are lowest overnight. A step up from that is solar diversion, where smart chargers like the Emporia monitor production and automatically charge when you’re generating excess — your EV becomes a sink for surplus power instead of exporting at low rates. And if you have home batteries like EG4 or Tesla Powerwall, you can store solar during the day, charge from batteries at night, and even use your EV as backup power with V2H or V2G-capable vehicles.
For those already running EG4 18kPV inverters, the 18kW continuous output handles most Level 2 chargers. Program charging during battery-full periods and use generator auto-start as backup during extended cloudy stretches.
Cold Weather Tips
If you deal with cold winters, precondition your battery while still plugged in so you’re using grid or solar power instead of draining range. Expect 20 to 40 percent less range in extreme cold and plan accordingly. Even an uninsulated garage helps keep the battery warmer and charging more efficient. And if you have an existing block heater outlet — common in cold rural areas — that’s already a 120V circuit you can use for Level 1 in a pinch.
Common Mistakes
Don’t undersize your circuit — install for the charger’s maximum capability, not just your current EV’s acceptance rate. Measure your cord reach before mounting (25 feet might not be enough). If your panel is near capacity, the premium for a smart charger with load management is worth it. Never skip the permit — insurance claims can be denied for unpermitted electrical work. And while NEMA 4-rated chargers handle weather fine, a simple roof or cover dramatically extends the charger’s lifespan.
What It Actually Costs
Most rural installations fall in the $800 to $1,500 range including the charger and installation. A budget DIY setup can come in around $450, while a premium install with panel upgrade might hit $5,200. My setup — a ChargePoint Home Flex on a 60-amp circuit with a 30-foot run from the panel, DIY installation — cost about $1,100 total. Annual fuel savings versus my old truck: roughly $2,400. The charger paid for itself in about six months.
Recommended Gear
- ChargePoint Home Flex — Best overall Level 2 charger
- Lectron 40A Charger — Best budget option
- Emporia EV Charger — Best for solar integration
- Lectron Portable — Best travel/backup charger
- 6 AWG Wire (50ft) — For 50A circuits
- 50A NEMA 14-50 Outlet — Standard EV outlet
Final Thoughts
An EV on a rural property isn’t just viable — it’s often ideal. You have the space for solar, the electrical capacity for Level 2, and the driving patterns that make home charging perfect. The key is planning your installation correctly from the start. Size for future needs, integrate with solar if you have it, and don’t cheap out on the charger — you’ll use it every day for the next decade.
Questions about your specific setup? Drop them in the comments.
This post contains affiliate links. Purchasing through these links supports Rural Upload at no extra cost to you.