When I decided to build a home gym on my rural Oklahoma property, I faced the same dilemma: should I build a new structure from scratch, convert an existing room, or find a creative alternative? After weighing my options, I landed on what turned out to be the perfect solution: converting a shipping container into a fully functional home gym.
After five months of daily use, I can confidently say this was one of the best decisions I’ve made for my property. Here’s everything I learned during the process, from initial planning to the finished product.
Why a Shipping Container Gym?
Before diving into the build, let me explain why I chose a shipping container over traditional construction. The decision came down to several key factors:
Cost-Effectiveness
Building a traditional outbuilding from the ground up would have cost me significantly more in materials and labor. A used 40-foot shipping container typically runs between $2,500-$4,500 depending on condition and location. Compare that to the cost of lumber, concrete work, roofing, and siding for a traditional build, and the savings become obvious.
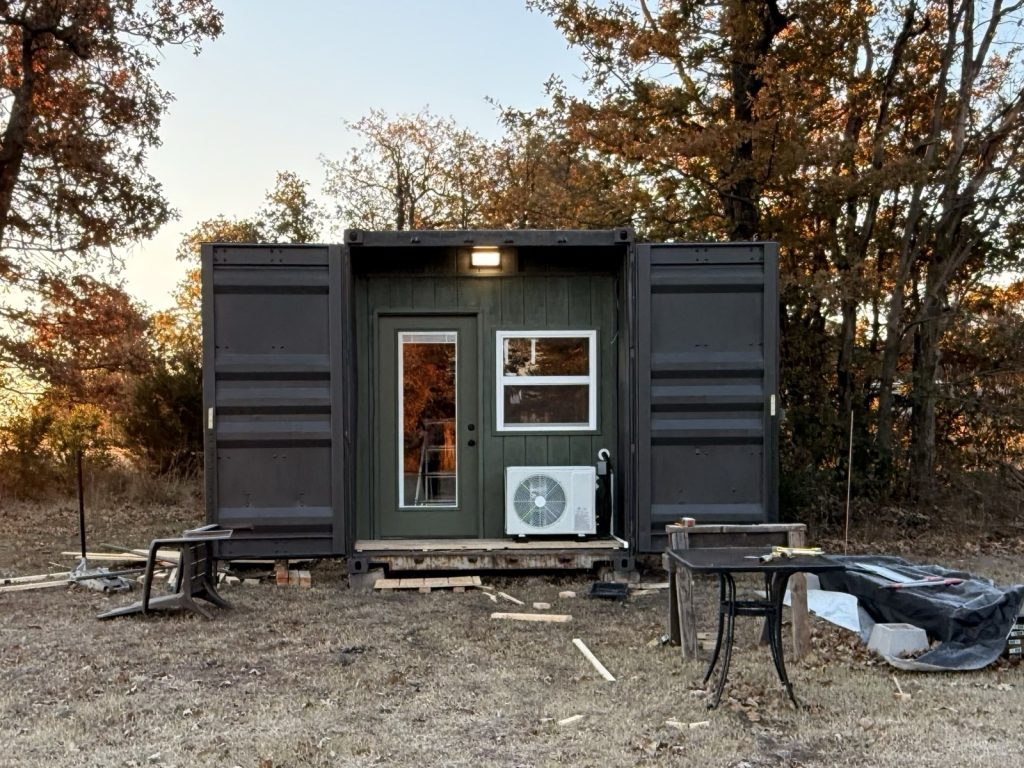
For my build, I went with a 40-foot hi-boy container (40′ L x 8′ W x 9’6″ H, giving me 320 square feet of workout space).
Already Weatherproof
Shipping containers are designed to survive ocean voyages and extreme weather. The corrugated steel construction is inherently weather-resistant, which meant I could start working on the interior immediately without worrying about protecting materials from the elements during construction.
Perfect for Rural Properties
On rural land, you have the freedom to get creative with structures. No HOA, no nosy neighbors complaining about your shipping container in theory. I simply had it delivered. The whole placement process took less than an hour.
The Before: An Empty Steel Box
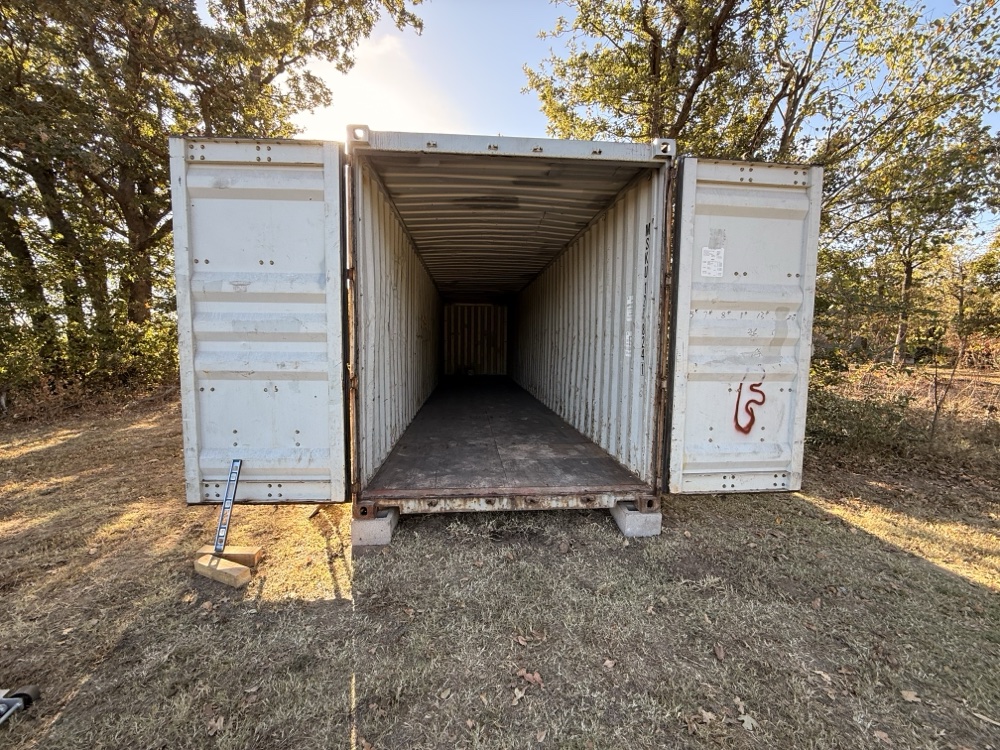
This is where it all started: an empty 40-foot shipping container sitting on my property. Looking at this bare metal box, it was hard to imagine it would become my favorite place to work out. But I had a clear vision: climate-controlled space, good lighting, and enough room for a full complement of free weights and equipment.
The Construction Phase: From Container to Gym
The transformation took about six weeks working on weekends and some evenings. Here’s how I broke down the project:
Step 1: Insulation
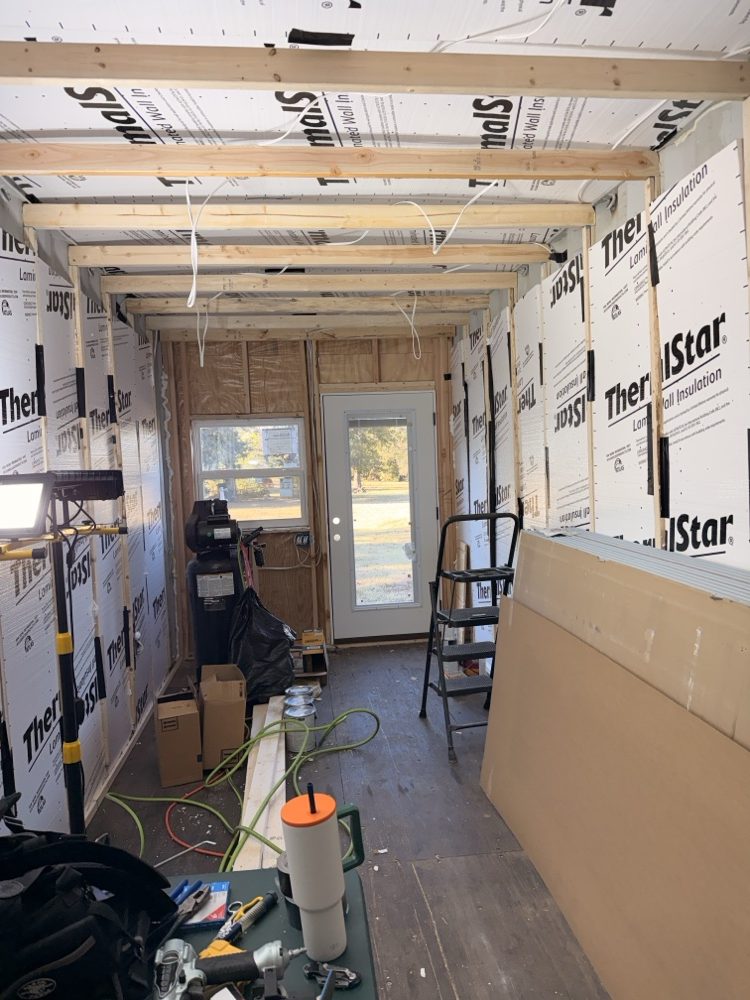
This was the most critical step. Without proper insulation, a metal shipping container becomes an oven in summer and a freezer in winter. I used foam board for the walls and ceiling, which provides excellent R-value I also use spray foam to seal gap in the form board and joints.
For the floor, I added insulated underlayment before the snap together flooring went down. This made a massive difference in comfort and energy efficiency.
Step 2: Electrical Work
I ran a dedicated 50amp line from my main panel to the container, giving me plenty of power for lighting and climate control. The electrical work included:
- LED lights mounted into the ceiling
- Outlets on each long wall every 8 feet
- 14/2 Romex
- 12/2 Romex
- 8/4 SO cord
- A dedicated 20amp circuit for the mini-split AC unit
- Weatherproof exterior outlet
- Porch light
- Smart switch
Since my property runs on solar with battery backup (I’ve written about my EG4 battery system before), the gym is powered mostly by renewable energy. On sunny days, my workout is literally solar-powered.
Step 3: Climate Control

Oklahoma summers are brutal, and winters can get cold too. I installed a 12,000 BTU mini-split heat pump that handles both heating and cooling. This was one of my best investments, the gym stays comfortable year-round, and the heat pump is incredibly efficient.
The mini-split head unit mounts on the interior wall, with the condenser outside. Installation took a full day, but it’s been absolutely worth it.
I ended up purchasing a smart thermostat for the mini split to control the unit remotely and from home assistant.
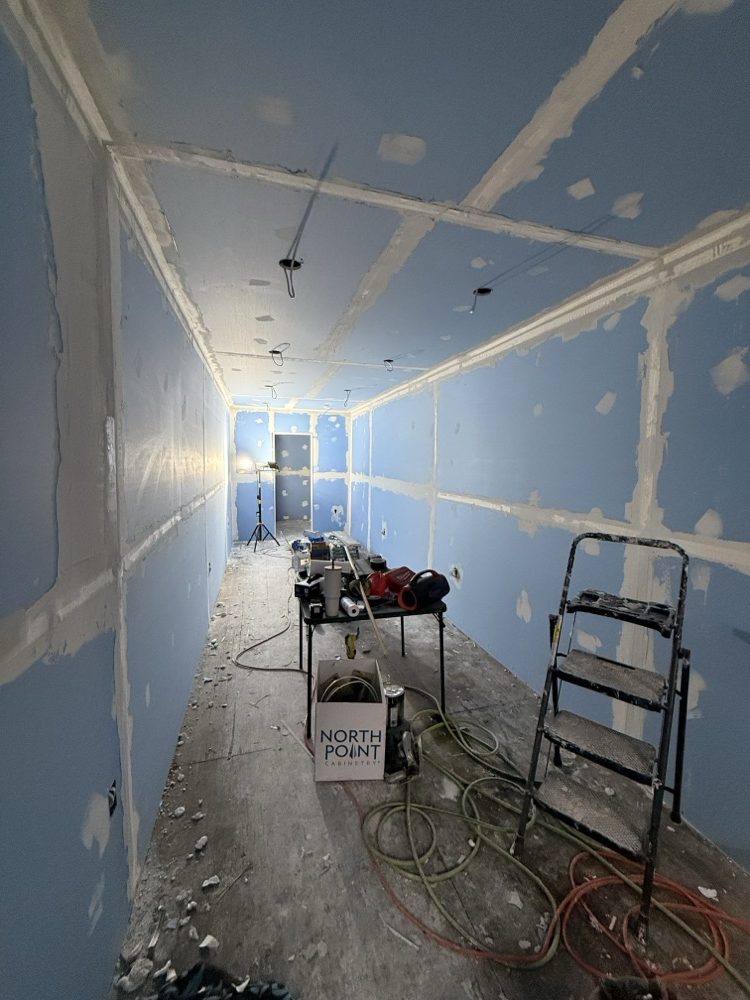
Step 4: Interior Finishing
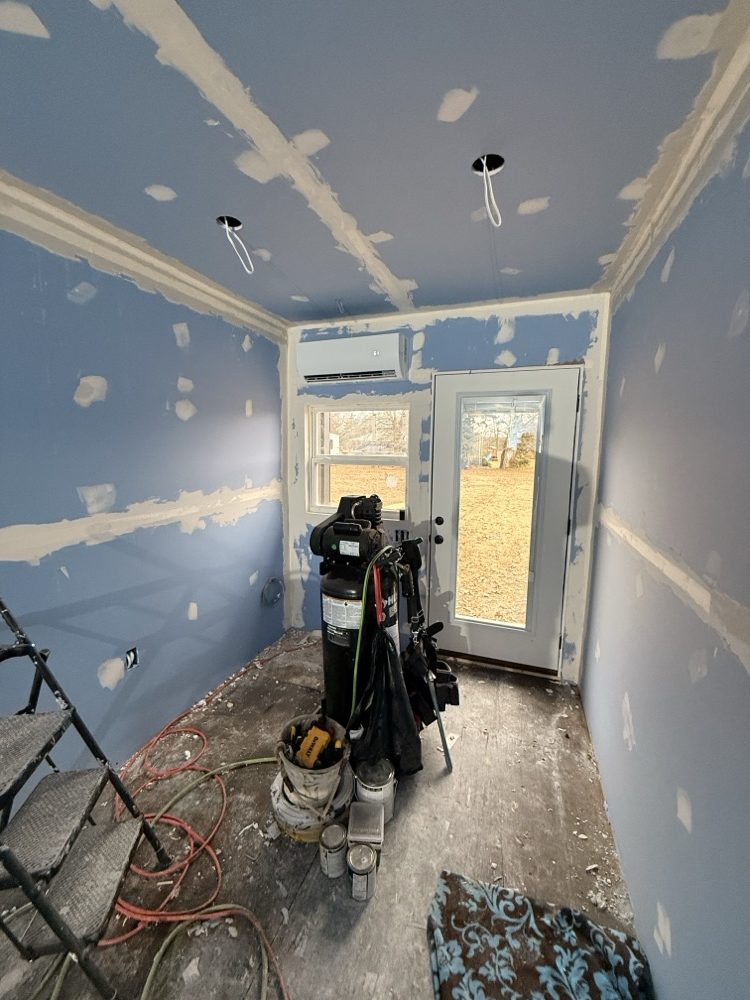
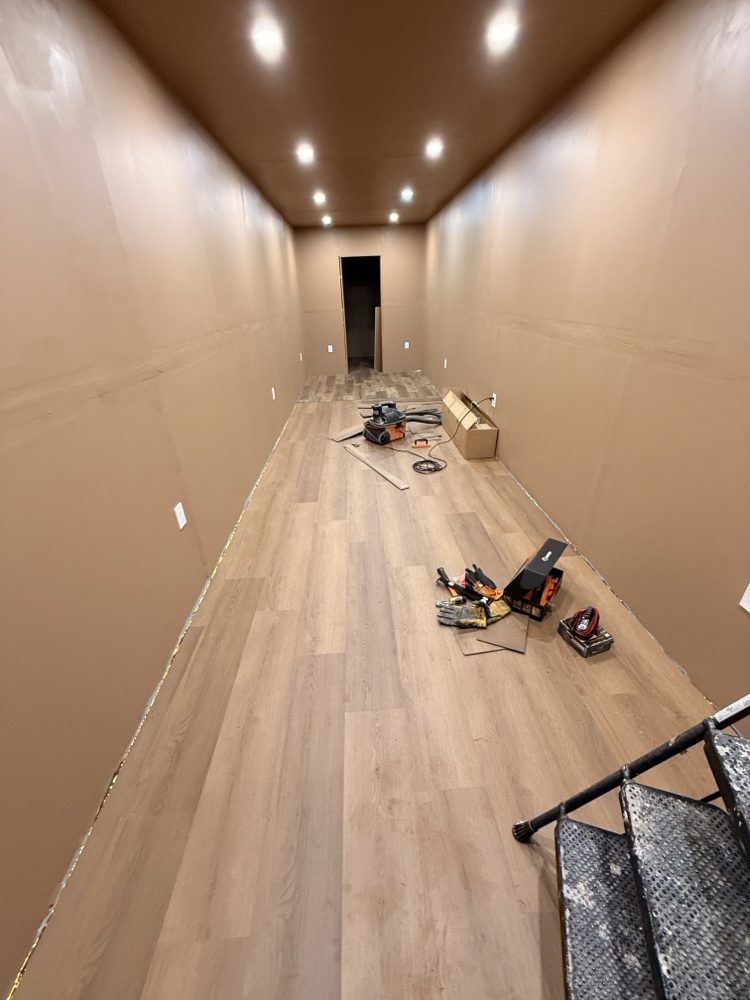
For the walls, I framed out with 2×3 lumber and covered everything with anti-mold drywall. I kept the finish simple, a coat of mocha paint to warm up the space and make it feel inviting.
The ceiling got the same treatment. The finished interior looks nothing like a shipping container. It’s just a clean, bright workout space.
Step 5: Flooring
I went with Matrix by Shaw Floors Premium 8MM Thick 7in x 60in 20 MIL Waterproof Luxury Vinyl Plank Flooring for the flooring from Costco. These interlock easily, provide excellent shock absorption for dropped weights, and are incredibly durable. The entire 320 square feet cost about $1600 in flooring, and installation was straightforward. Just a few hours with a utility knife for the edge cuts.
Step 6: Equipment Installation
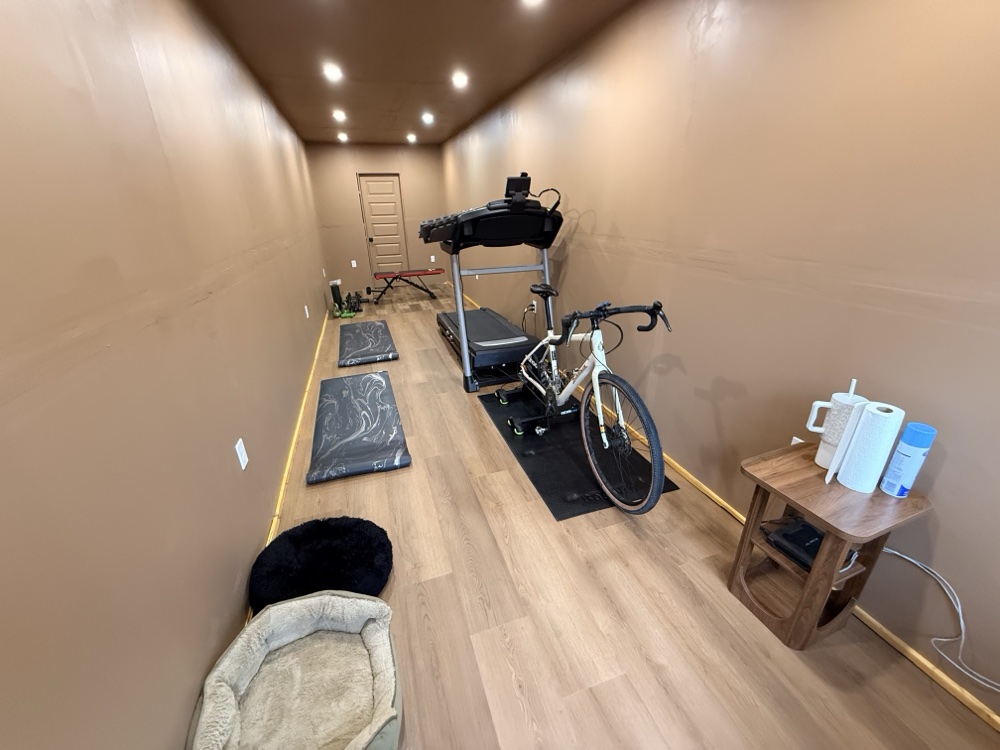
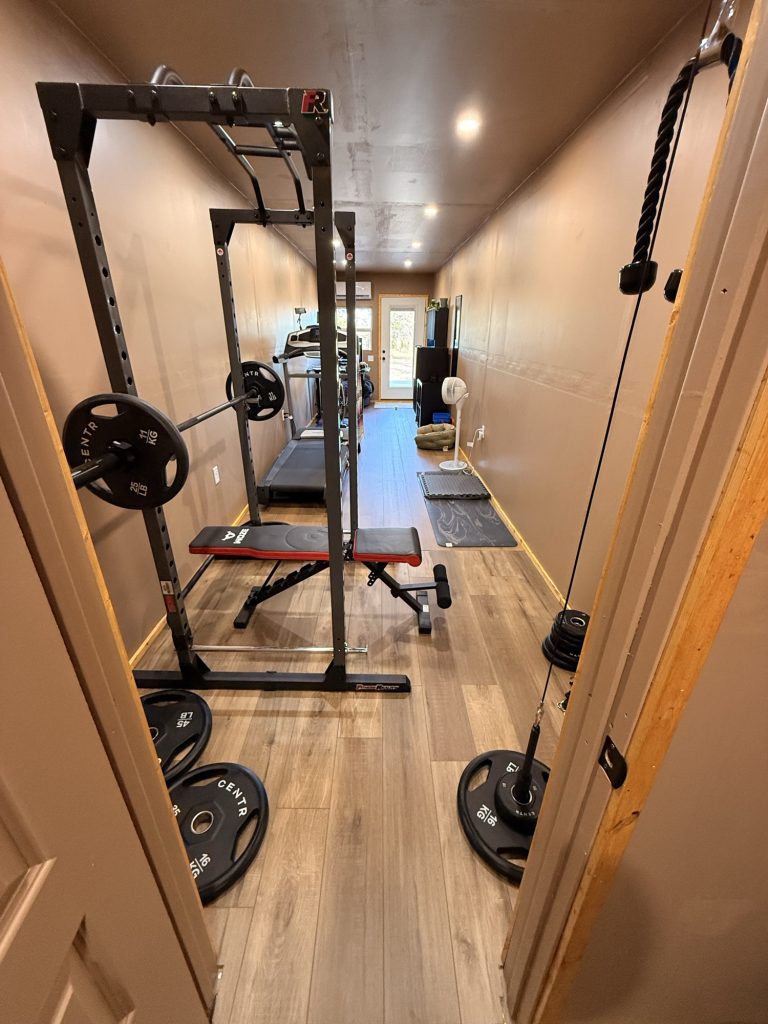
With the infrastructure complete, it was time for the fun part: adding equipment. My setup includes:
- Power rack with pull-up bar
- Olympic barbell
- Weight Plates
- Adjustable bench
- Dumbbells set
- Cable system
- Resistance bands and accessories
The 9-foot ceiling height in the container provides plenty of clearance for pull-ups and overhead presses.
Final Touches
The final phase included adding mirrors (crucial for form checking), a fan for additional air circulation, and a HomePod for music. I also added some motivational posters because, let’s be honest, we all need that extra push sometimes.
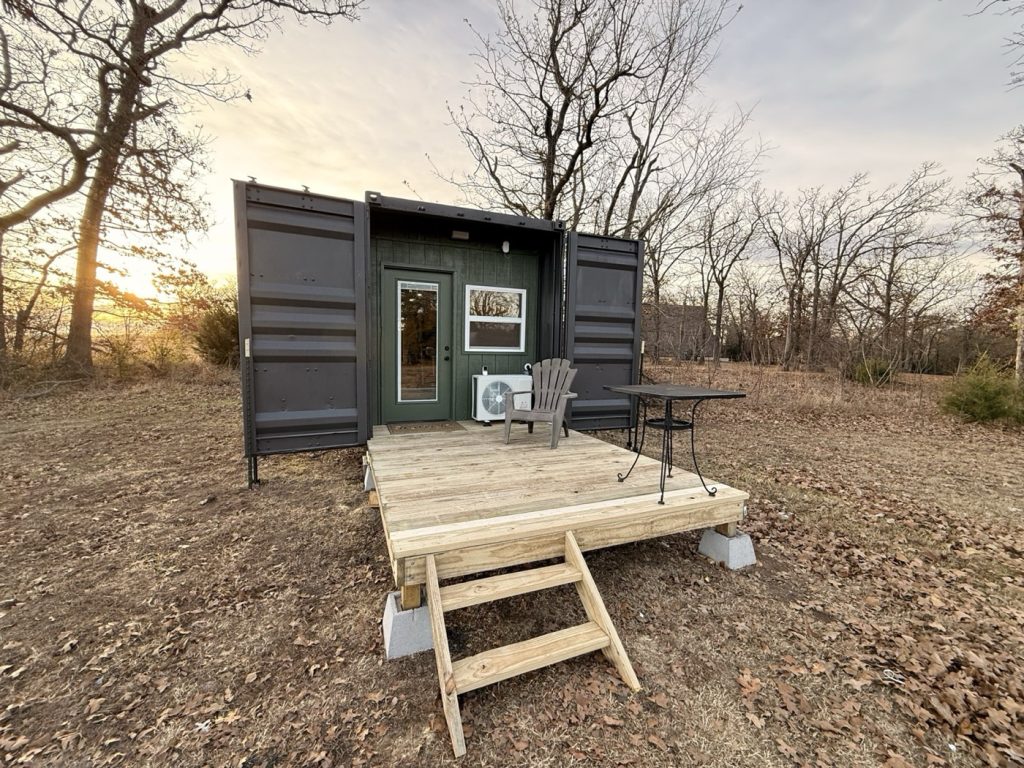
The Results: Five Months Later
Five months after completing the build, the gym has held up perfectly. The climate control works flawlessly, the equipment is in excellent condition, and the space continues to be my favorite place on the property.
The real results aren’t just in the gym itself, they’re in the consistency this space has enabled. Having a private, comfortable, 24/7 accessible gym on my own property has completely transformed my fitness routine.
Cost Breakdown
Here’s roughly what I spent on this project:
- Shipping container: $3,500 (delivered)
- Insulation materials: $800
- Electrical (wire, outlets, lights, breaker): $800
- Mini-split HVAC system: $500
- Lumber and interior finishing: $1200
- Flooring: $1600
- Gym equipment: $2,500
- Miscellaneous (paint, hardware, etc.): $1800
Total: $12,700
Compare that to the $18,000-$25,000 cost of building a traditional outbuilding, plus monthly gym memberships ($30-$100/month), and the ROI becomes clear. This gym will pay for itself within a few years. But some things are not just about ROI, it’s about having a private space to put in the effort.
Lessons Learned
What Worked Well
The foam board insulation was worth every penny. Don’t skimp on this. The temperature regulation is excellent, and it dramatically reduces the HVAC workload.
Oversized electrical capacity. I ran a 50-amp circuit even though I don’t need that much power now. This gives me room to add more equipment or features in the future.
Matrix flooring. Cannot recommend this enough. It’s durable, safe, and makes the space feel professional.
What I’d Do Differently
Add more windows. I only put in one small window and have to use fans for cross-ventilation. I didn’t want to cut steel and I wanted it to be modular if I needed to move it without compromising any structural components of the container. I may add rear ventilation eventually.
Why This Is Perfect for Rural Living
Living in rural Oklahoma means the nearest commercial gym is a 25-minute drive each way. That’s 50 minutes of commute time for every workout, time I’d rather spend actually training.
With my container gym, I can:
- Work out any time, day or night, without planning around gym hours or driving
- Enjoy complete privacy—no waiting for equipment or self-consciousness about your workout
- Control the environment—temperature, music, lighting, everything
- Save money on monthly memberships and gas
- Build equity in a permanent structure on my property
As someone who’s also integrated this into my home automation system through Home Assistant, I can pre-heat or pre-cool the gym before my workout, track energy usage, and even monitor when someone’s using the space (wife or I). (That’s a topic for another post!)
Final Thoughts
Converting a shipping container into a home gym has been one of the most rewarding projects I’ve tackled on my property. The combination of cost-effectiveness, durability, and customization made it the ideal solution for my needs.
If you’re considering a similar project, my advice is simple: do it. The initial investment is reasonable, the construction is straightforward (even for intermediate DIYers), and the long-term benefits are substantial.
For rural homesteaders, off-grid enthusiasts, or anyone who values self-sufficiency and privacy, a shipping container gym checks every box. Five months in, I have zero regrets—only gains.
Have questions about the build process or want more details on any specific aspect? Drop a comment below!